
How to Fix a Leaking Shingle Roof in South Florida in 6 Steps
Posted 2.04.2026 | 10 Minute Read
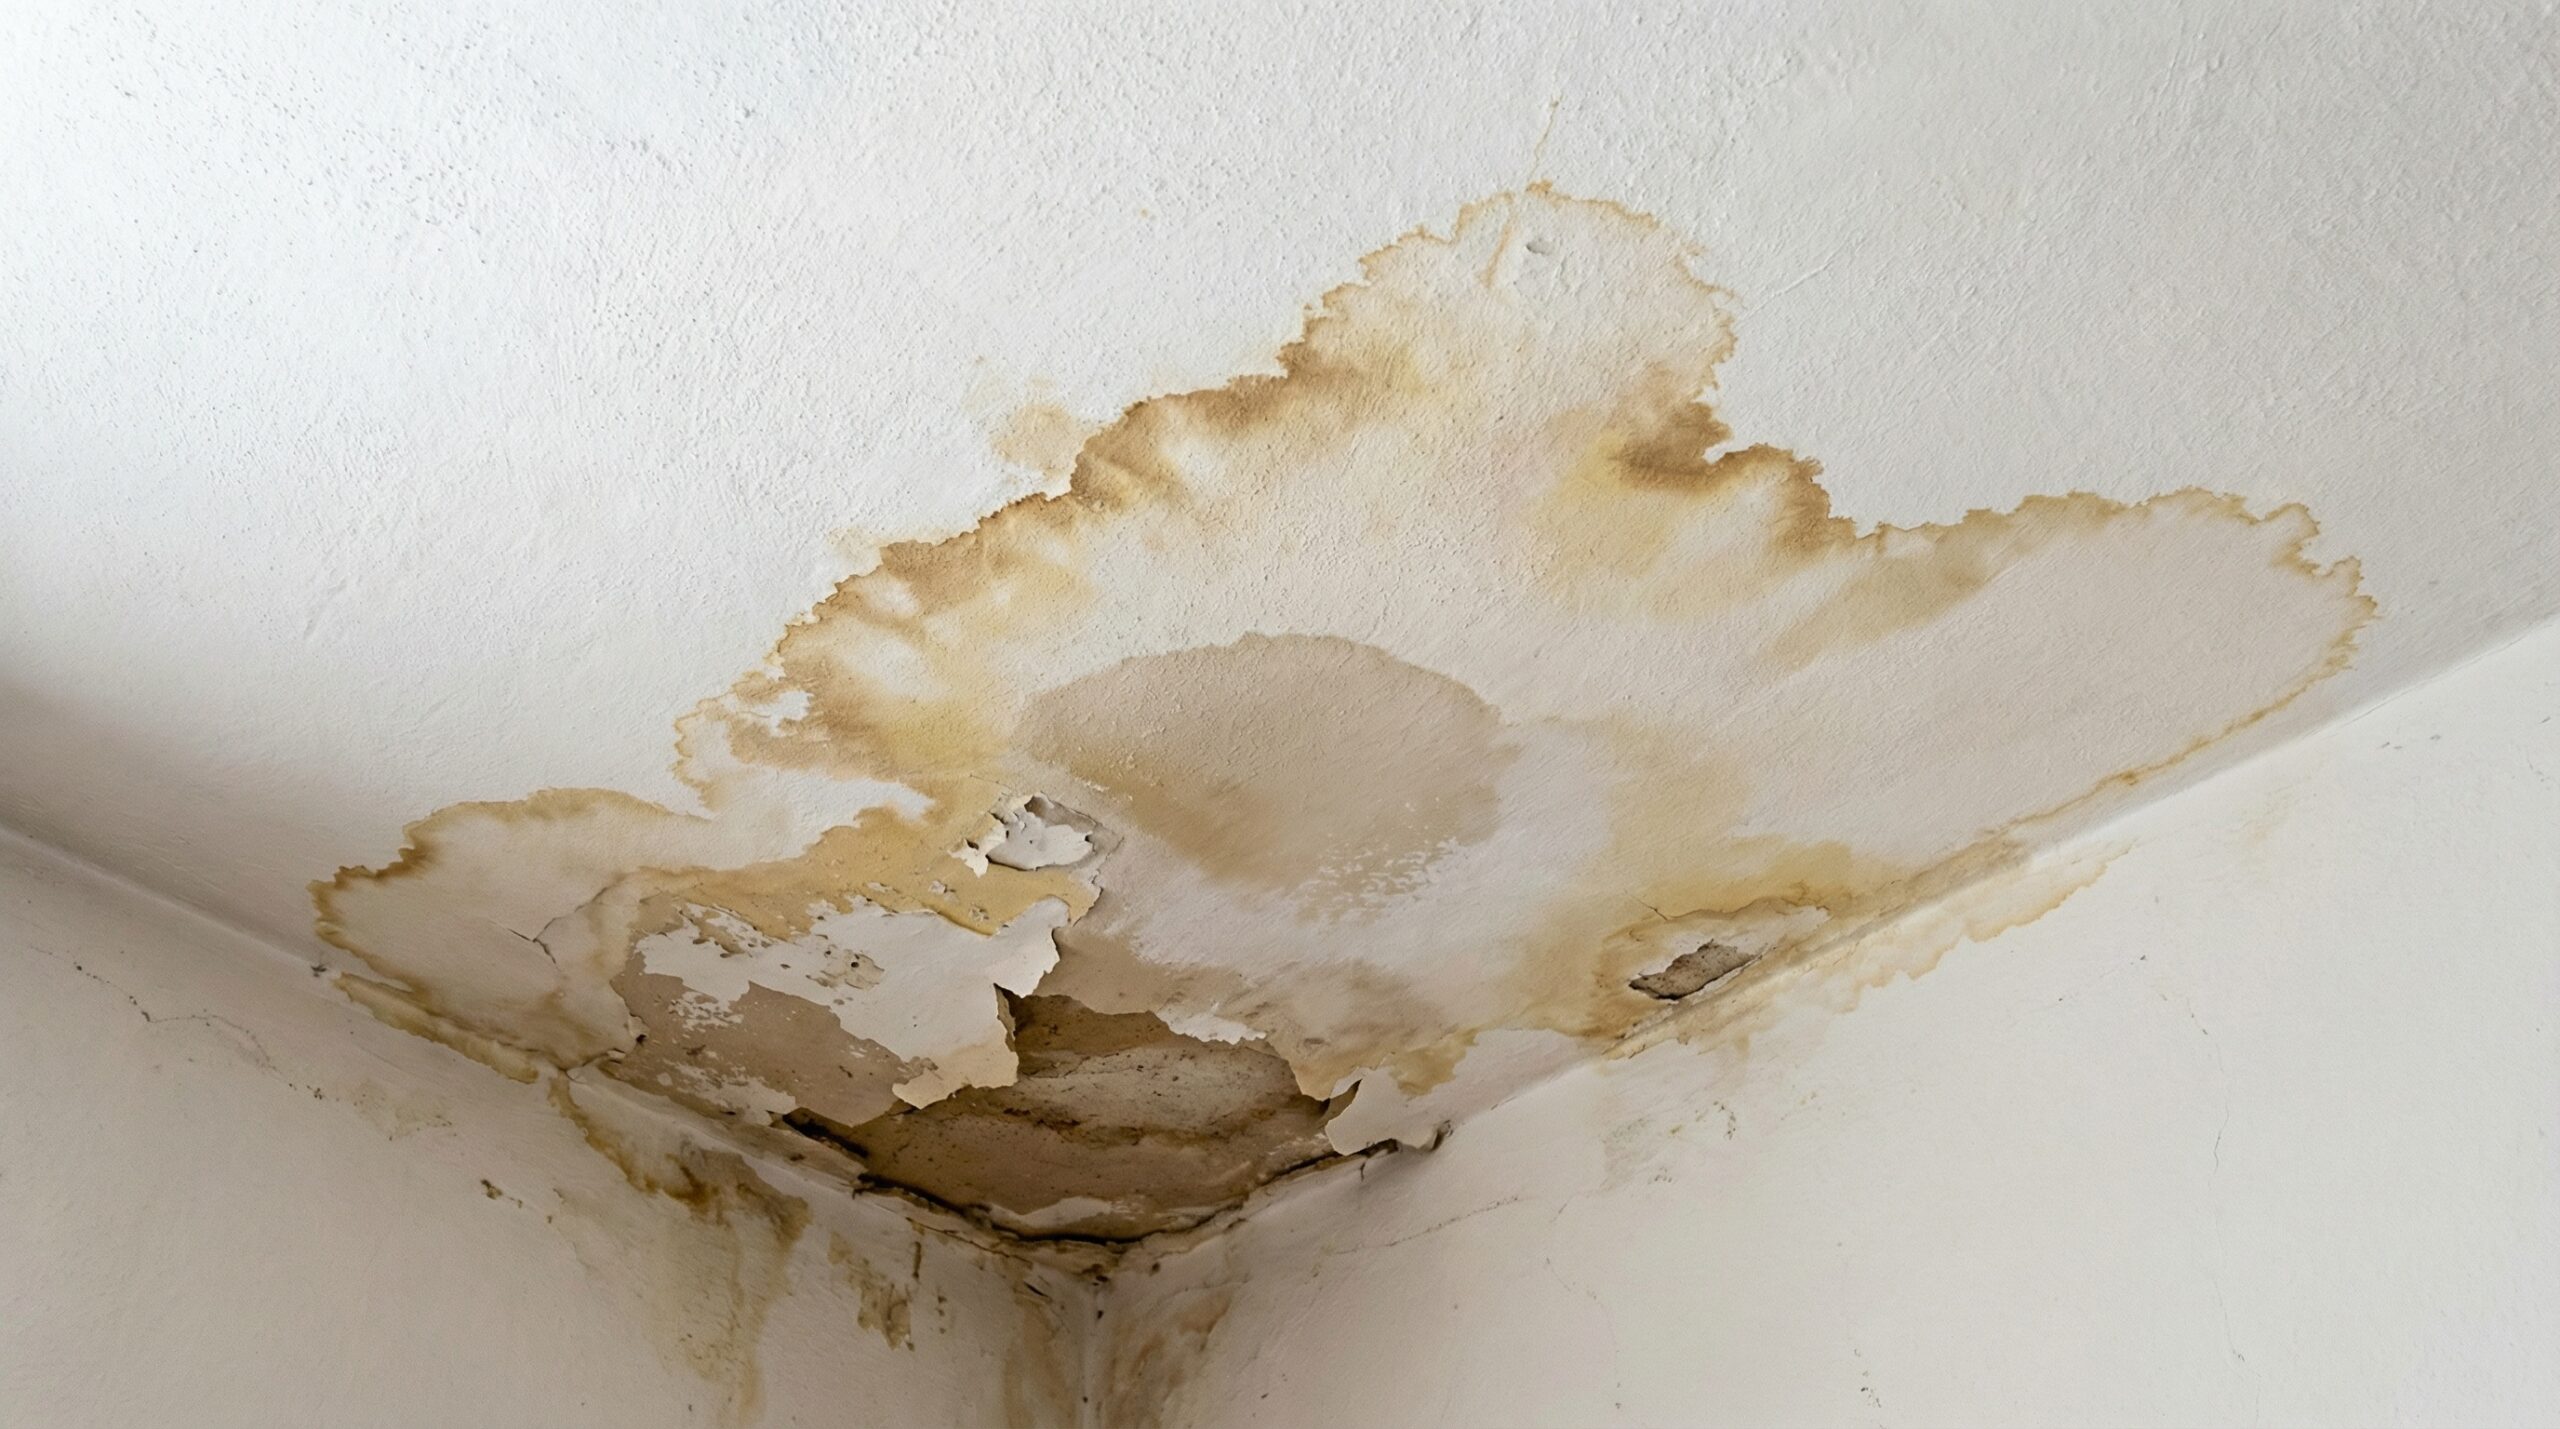
A leaking shingle roof can transform from a minor drip into thousands of dollars in structural damage within just 24-48 hours. The good news? Most shingle roof leaks can be caught early and repaired before they escalate into major problems that threaten your home’s integrity.
Fixing a leaking shingle roof involves six key steps: identifying leak signs, safely locating the source, gathering proper tools, repairing damaged areas, addressing problem zones like vents and flashing, and knowing when professional help is needed. With asphalt shingles covering nearly 70% of homes in South Florida and lasting 15-50 years when properly maintained, understanding basic repair techniques can save you significant money and protect your investment.
Quick fact: According to insurance claims data, the average roof leak repair costs $175 to $450, but catching it early prevents thousands in structural damage from water intrusion and mold growth.
This guide walks you through each repair step safely and effectively, helping you determine what you can handle yourself versus when to call the experts at Coastal Roofing of South Florida.
Essential safety precautions before starting
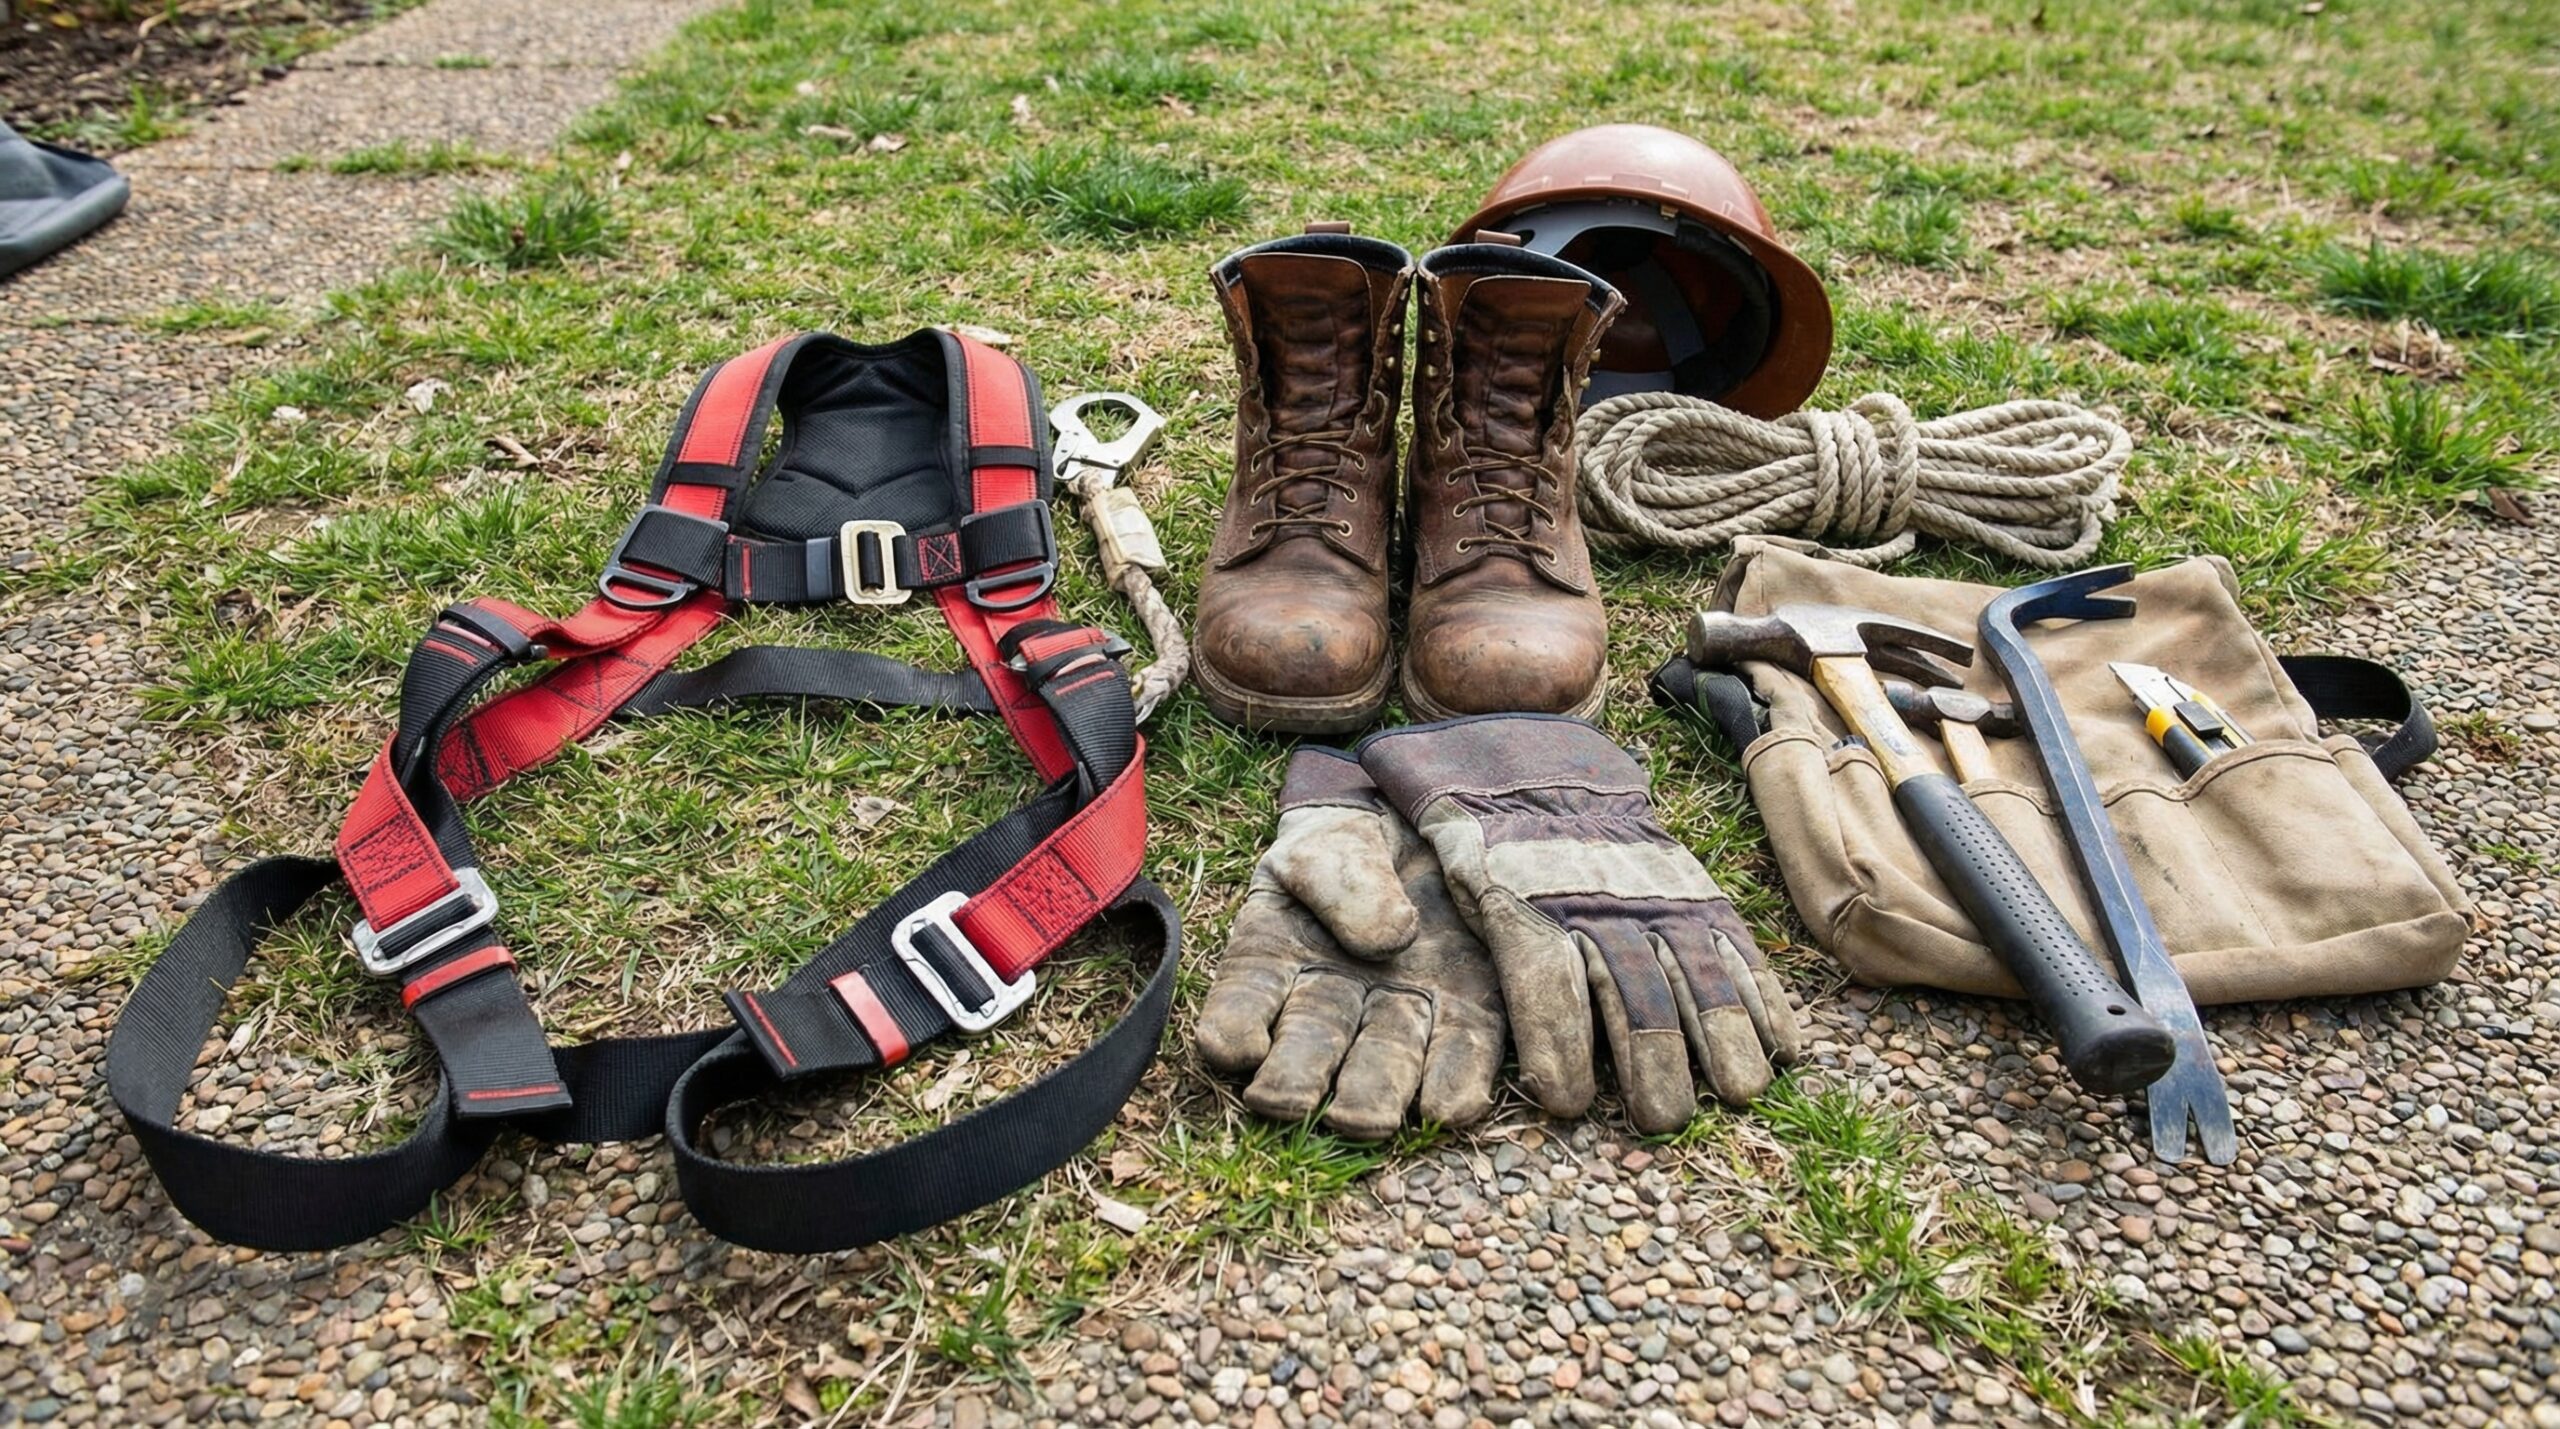
Working on your roof requires serious attention to safety, especially in South Florida’s challenging climate conditions with intense sun, hurricanes, and frequent rainfall. Before you even think about climbing up, you need the right approach and equipment to protect yourself.
Always wear soft-soled boots that provide excellent grip on asphalt shingles. If your roof has any significant pitch, invest in a Personal Fall Arrest System (PFAS) or fall restraint system. Never attempt roof work alone; have someone on the ground to steady your ladder and monitor your safety.
Timing matters tremendously for shingle repairs in Palm Beach County’s climate. Choose a dry, warm day when asphalt shingles are pliable and easier to work with. Avoid cold weather when shingles become brittle and crack easily, but also steer clear of scorching midday sun that makes shingles too soft and prone to tearing. Early morning or late afternoon often provides ideal conditions.
Turn off electrical power to any areas where water is entering your home. Water and electricity create dangerous combinations, so check for wet outlets, light fixtures, or appliances near leak areas before beginning any work.
How to locate the leak source effectively
Finding where water actually enters your roof often proves more challenging than the repair itself. Water rarely travels straight down; it can seep through a small gap, travel several feet along rafters, then drip into your living space far from the original entry point.
Start your investigation in the attic with a flashlight. Look for water stains, dark spots, or discoloration on wooden sheathing and rafters. Check for black mold or mildew on insulation and damp spots on ceiling drywall. These clues help you trace water’s path backward to its source.
When interior inspection doesn’t reveal the entry point, try the garden hose test. Have someone stay in the attic with a phone while you go on the roof. Start spraying water at the lowest point near suspected areas like vents or valleys, working your way up slowly. When your helper spots a drip, you’ve found your culprit.
Pro tip: Pay special attention to roof penetrations like chimneys, vent pipes, skylights, and valleys where two roof planes meet, as these areas account for most leak sources in South Florida’s weather conditions.
Required tools and materials for repairs
Gathering the right tools before starting saves time and ensures quality repairs. Most items are available at local hardware stores throughout West Palm Beach, Jupiter, and Boca Raton, and having everything ready prevents dangerous multiple trips up and down your ladder.
Essential tools include a flat pry bar for lifting shingles without damage, a utility knife for trimming materials, and a caulk gun for precise sealant application. You’ll need a hammer (preferably a roofing hammer), plus 1.25-inch or 1.5-inch galvanized roofing nails that resist rust in South Florida’s humid conditions.
For materials, stock up on asphalt roofing cement or high-quality rubberized sealants designed to withstand intense UV exposure and temperature fluctuations. Purchase replacement shingles that match your existing color and style as closely as possible. Having extra materials on hand prevents project delays when you discover additional damage during repairs.
Consider emergency supplies like tarps and 2×4 wooden strips for temporary fixes if permanent repairs must wait due to weather or material availability—especially important during hurricane season.
Step-by-step repair techniques for common damage
Different types of shingle damage require specific repair approaches. Understanding these techniques helps you address problems effectively and prevents recurring issues in South Florida’s challenging climate.
For curled shingles caused by intense heat exposure common in our region, apply generous amounts of asphalt roofing cement under the curled corners using your caulk gun. Press the shingle down firmly and consider weighing it with a brick for 24 hours until the bond sets properly.
Cracked or torn shingles often can be repaired rather than replaced if damage isn’t extensive. Apply roof sealant under the crack and another bead on top, spreading it with a putty knife. Sprinkle loose granules from your gutters over wet sealant to make repairs nearly invisible.
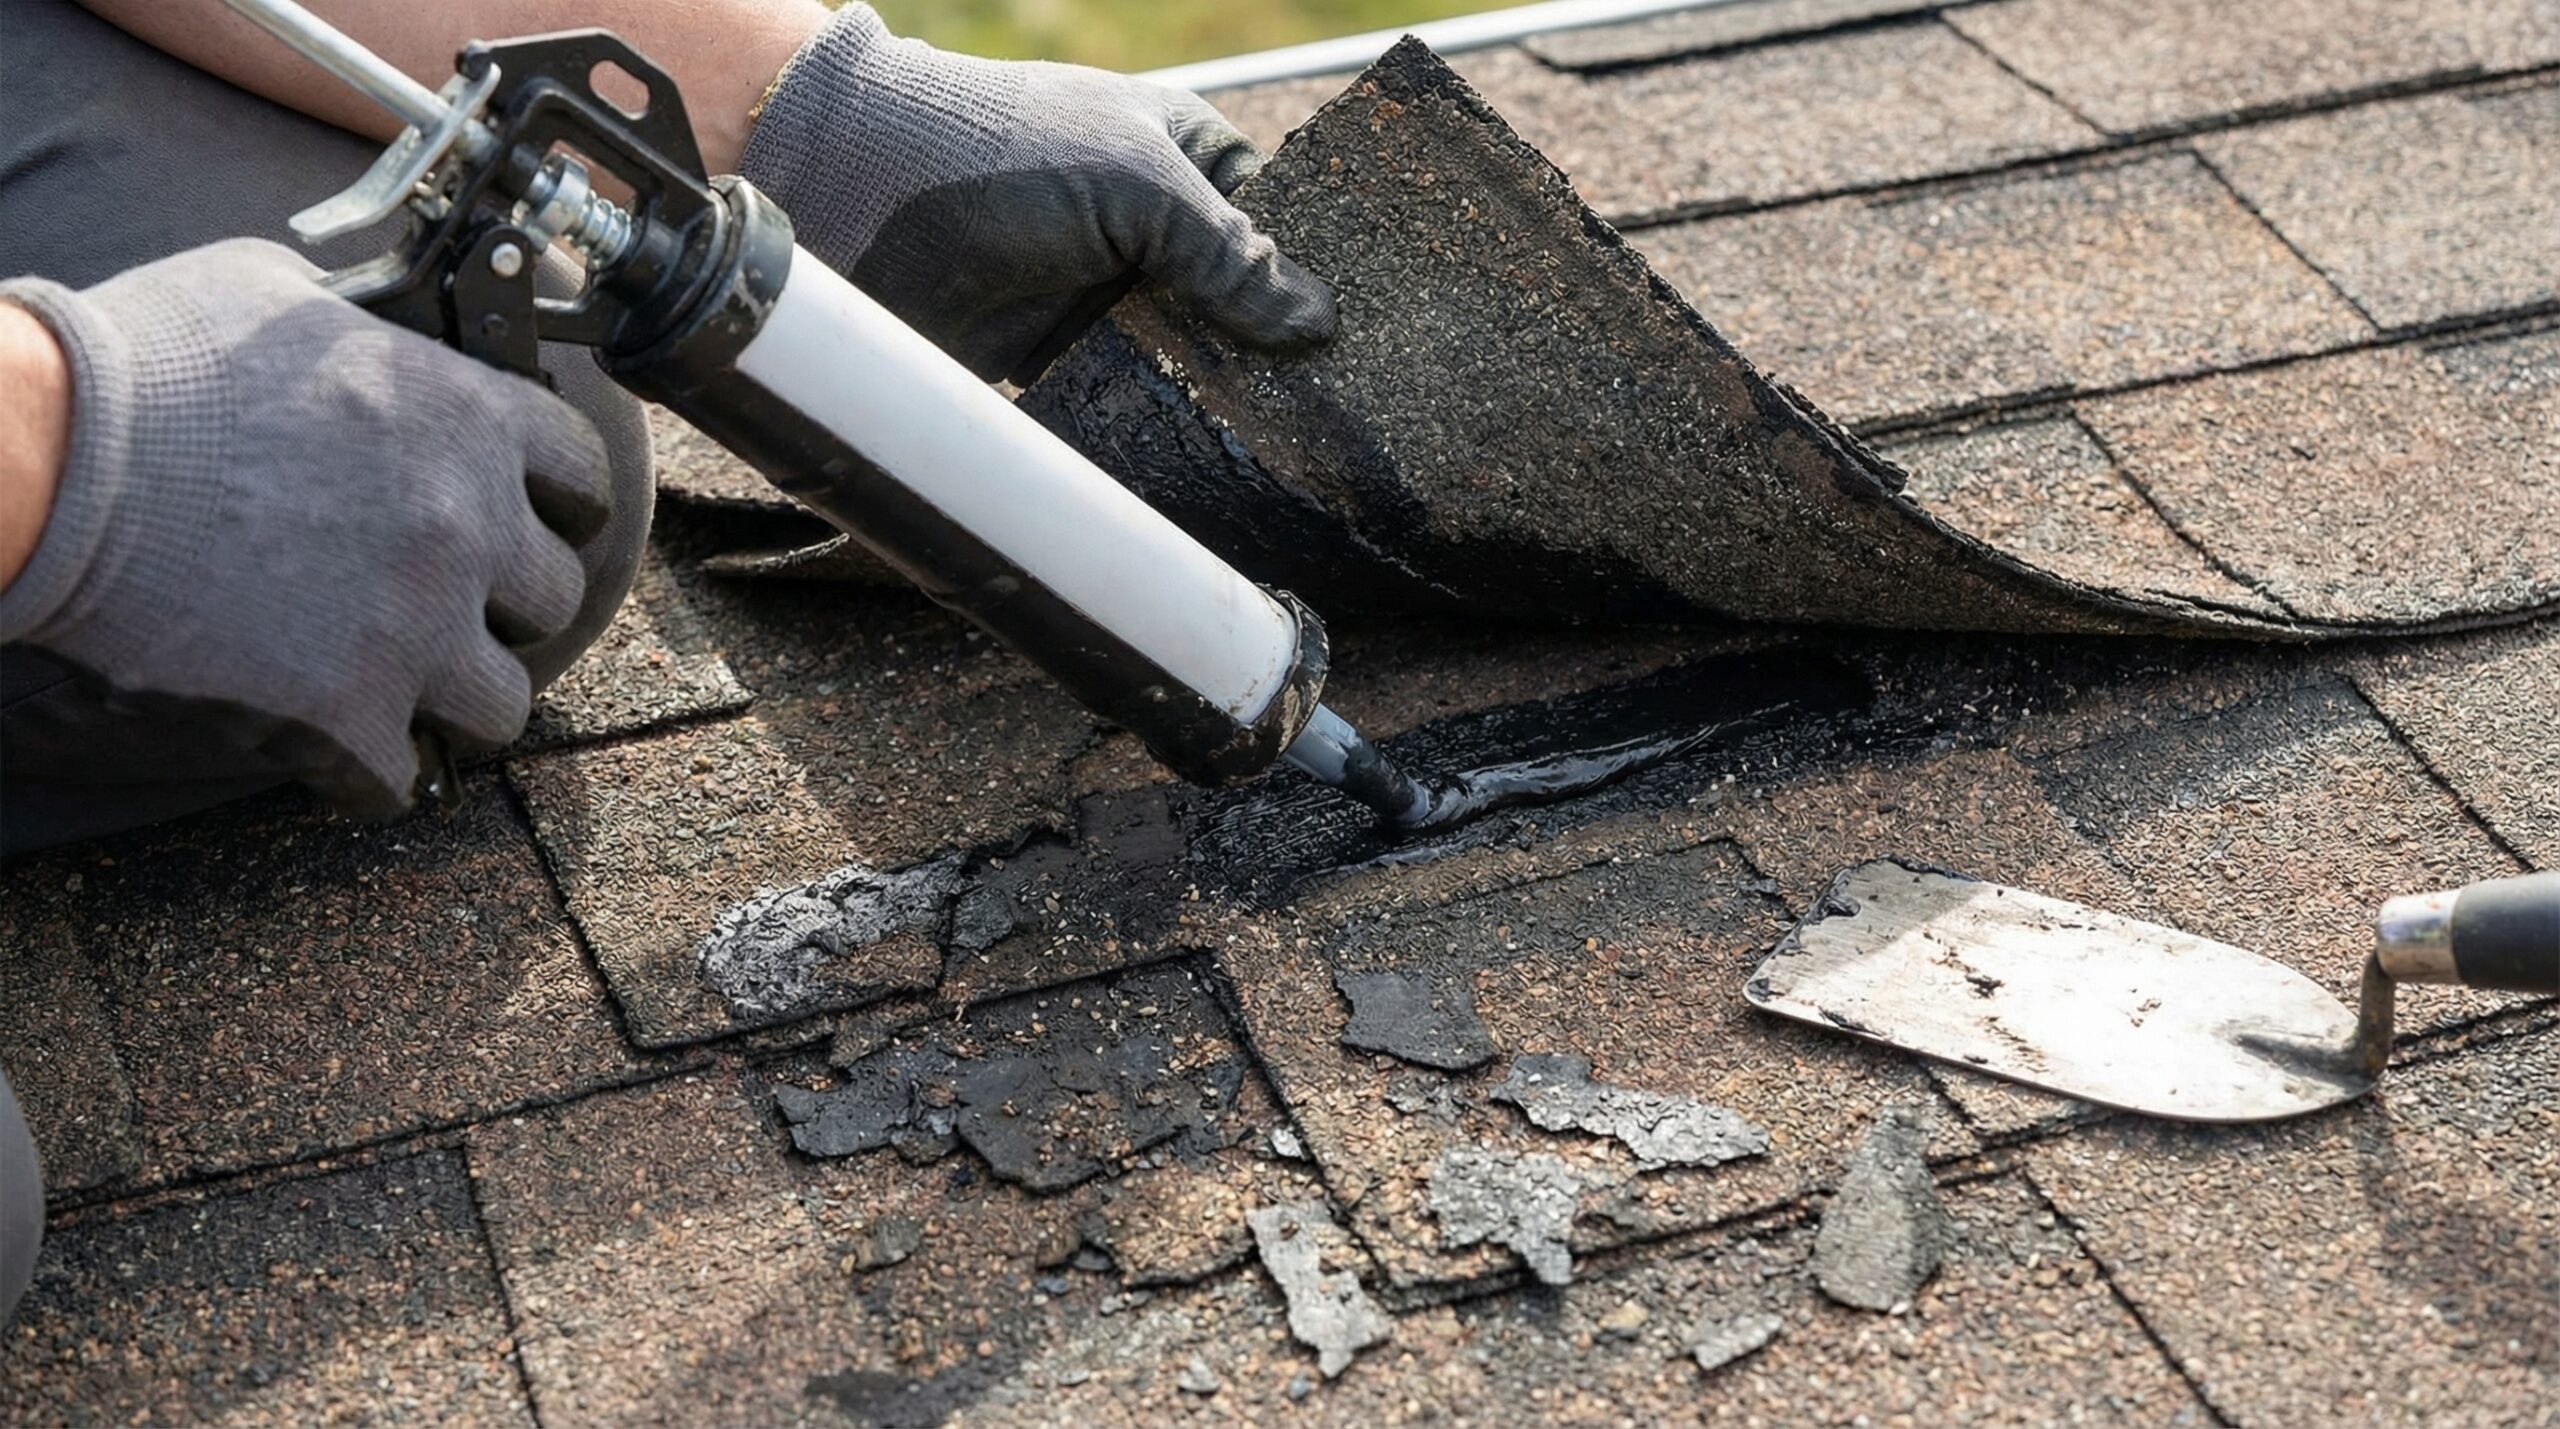
Replacing missing or heavily damaged shingles requires more steps but remains manageable for most homeowners. Gently lift shingles in the row above the damaged one, carefully pry out nails holding the damaged shingle, then slide the old piece out. Round the back corners of your new shingle slightly with a utility knife to ease installation, slide it into position, nail it down in the nailing strip, and apply small dabs of sealant over nail heads. For comprehensive guidance on asphalt shingle repair techniques, including detailed instructions for various damage scenarios, consult professional resources.
Addressing problem areas like vents and flashing
Most roof leaks originate at penetrations where pipes, vents, or other structures pierce through your roofing system. These areas require special attention and different repair techniques than standard shingle work, particularly in South Florida where UV exposure accelerates material degradation.
Plumbing vents commonly develop leaks when rubber boots around pipes crack from intense UV exposure. If the metal base remains solid, you can often replace just the rubber boot by sliding a new one over the pipe. This simple fix prevents water intrusion at a fraction of full replacement cost.
Flashing around chimneys, skylights, and wall intersections needs regular maintenance in our climate. When sealant around flashing dries out and cracks from heat cycles, water seeps through these gaps. Clean out old, brittle caulk completely and apply fresh high-quality roofing sealant designed for Florida conditions. If metal flashing shows rust damage or holes, replacement becomes necessary. Learn more about chimney flashing repair costs and techniques to properly address these critical areas.
Valley repairs require extra care since these channels handle massive water volumes during South Florida’s intense rainfall and hurricane seasons. Leaks often occur when nails were placed too close to the valley center. You may need to lift surrounding shingles and install new ice and water shield or metal valley flashing for lasting protection. Understanding roof underlayment types and installation is crucial for proper valley protection in our climate.
Important note: Valley and flashing repairs often indicate underlying issues that may require professional assessment to prevent recurring problems, especially given South Florida’s weather challenges.
When to call professionals versus DIY limits
Knowing your limits prevents costly mistakes and ensures your safety. While many minor repairs suit DIY approaches, certain situations demand professional expertise and equipment—particularly important in South Florida where weather conditions can quickly worsen damage.
Handle DIY repairs when damage remains isolated, such as a few shingles blown off during storms or small areas of flashing that need resealing. If you’re comfortable on ladders, have proper safety equipment, and can clearly identify the problem source, basic repairs often prove cost-effective. For wind-related damage, understanding how to fix wind damage to roof shingles helps you assess whether DIY is appropriate.
Call professionals immediately if you notice widespread damage, structural issues like sagging, or multiple leak locations. Roofs approaching 20 years old with extensive granule loss typically need replacement rather than repairs. When gutters constantly fill with granule debris, your shingles have lost UV protection and failure accelerates rapidly in our intense sun. Understanding what is considered an old roof in Florida helps you make informed decisions about repair versus replacement.
| Repair Type | DIY Suitable | Professional Required |
|---|---|---|
| Single damaged shingles | Yes | Complex structural damage |
| Simple flashing resealing | Yes | Multiple leak sources |
| Vent boot replacement | Yes | Widespread granule loss |
| Emergency tarping | Yes | Sagging roof areas |
Professional inspections cost around $200 but catch problems before they become expensive emergencies. This investment provides peace of mind and helps you plan for necessary repairs or replacement timing. Coastal Roofing of South Florida offers comprehensive inspections within 48 hours and can provide workmanship warranties up to 30 years. Consider getting a free, no-obligation roof repair estimate to understand your options without commitment.
Regular maintenance prevents most emergency repairs and extends your roof’s lifespan significantly in South Florida’s challenging conditions. Inspect your roof twice yearly in spring and fall, looking for lifted, cracked, or missing shingles. Keep gutters clean since clogs cause water backup under starter shingles, leading to fascia rot and leaks. Trim overhanging tree branches that scrape shingles during high winds and ensure proper attic ventilation to prevent heat damage from inside your home.
Taking action early when you spot potential problems saves money and protects your home’s structural integrity. Whether you tackle repairs yourself or work with Coastal Roofing of South Florida’s experienced team serving West Palm Beach, Jupiter, Boca Raton, and throughout Palm Beach County, addressing leaks promptly keeps your home safe and dry for years to come.