
How to Tarp a Roof After Storm Damage Safely
Posted 7.24.2026 | 6 Minute Read
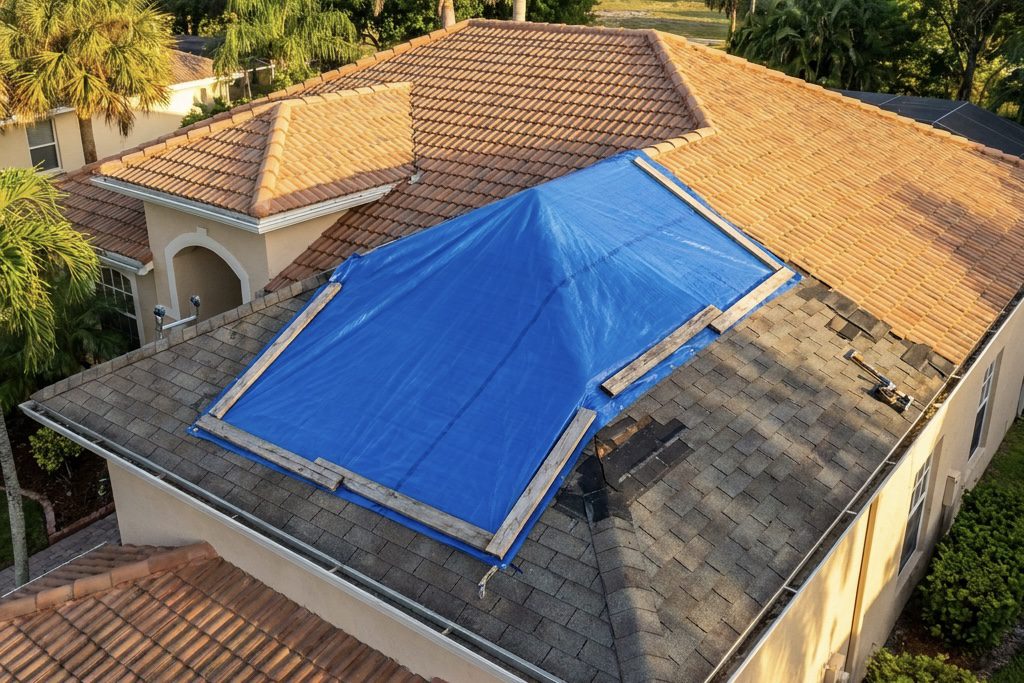
A storm just tore through, and now you’ve got a damaged roof and rain in the forecast. Tarping a roof is one of the most effective ways to stop water intrusion and protect your home until a professional repair can happen, but only if you can do it safely, and not every situation calls for a DIY fix. This guide walks you through how to tarp a roof correctly, and exactly when to put the ladder away and call someone instead.
- Decide Whether DIY Tarping Is Even the Right Call
Before anything else, be honest about the situation. DIY tarping is reasonable when the roof pitch is 4:12 or less, the damaged area is localized and clearly defined, the decking underneath is still structurally sound, and you have a second person on site. If any of those conditions aren’t met, the risk-to-reward calculation changes fast.
Stop and call a licensed contractor if the roof pitch is steeper than 6:12, the structural decking is visibly broken or sagging, the damaged area covers more than a third of the roof, or there’s been any interior ceiling collapse.
- Gather Your Materials Before You Climb
Running up and down a ladder to grab forgotten tools is how small jobs turn dangerous. Have everything staged at the base before you go up: a 6 mil polyethylene tarp sized to cover the damaged area plus at least 4 feet on every side, 2×4 lumber boards cut to tarp width, 1.5 to 2 inch self-tapping roofing screws, a fully charged drill, a utility knife, rubber-soled shoes (non-negotiable in South Florida’s heat where a worn sole is a slip waiting to happen), and a safety harness with rope for any roof with meaningful slope. You also need a helper on the ground. Never roof alone after storm damage.
- Access the Roof Safely After Storm Damage
Walk the perimeter at ground level first. Use binoculars if you have them. You’re looking for missing shingles, exposed decking, cracked flashing around chimneys or vents, and any areas where debris has punched through.
Additionally, storm-damaged roofs are unpredictable. Decking can be soft or cracked underneath; shingles that look fine from the outside. Before stepping onto the surface, inspect from the ladder first. Look for visible sagging, broken rafters showing through gaps, or sections that feel springy when you press on them from the edge. Always have someone holding the base of the ladder and watching your movements.
After a major storm in Palm Beach or Martin County, post-storm adrenaline leads a lot of homeowners onto roofs they have no business being on. If anything looks structurally uncertain, stay off and get a professional assessment before proceeding.
- Placing and Anchoring the Tarp
This is where most DIY tarp jobs fall apart, so it deserves attention.
The Right Way
The tarp should run up the slope, over the ridge, and down the other side. This forces runoff to drain away from the damage rather than pooling at the peak. Once positioned, fold the top edge of the tarp over a 2×4 board and drive roofing screws through the board, tarp, and into the decking every 12 inches.
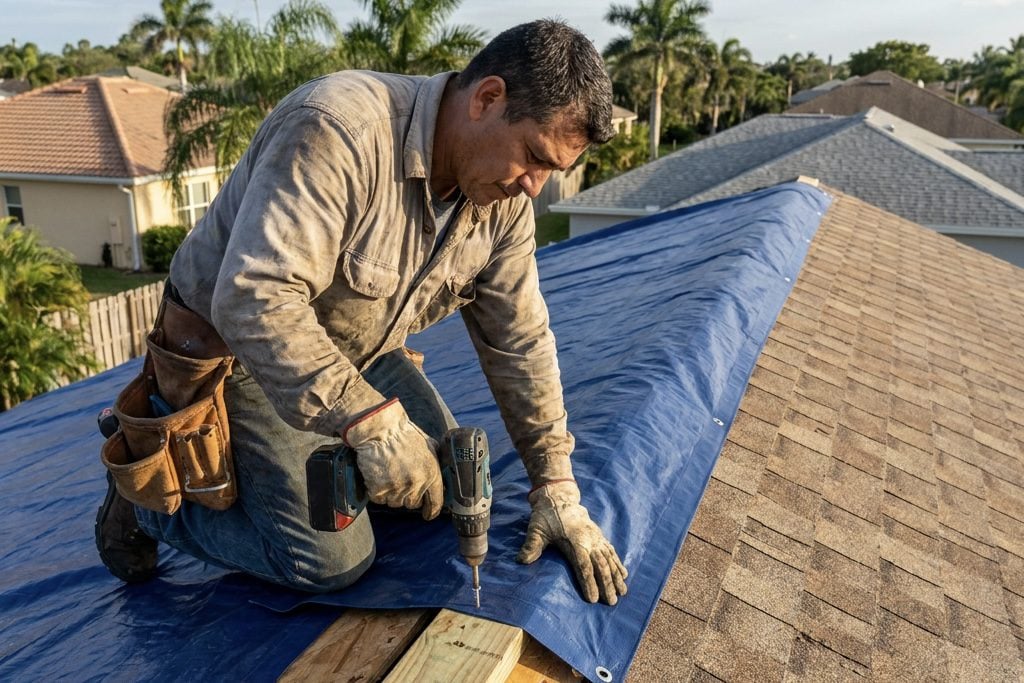
Repeat the same board-and-screw method on the bottom edge and along both sides. If the tarp extends over the ridge, anchor a board along the ridge line as well.
The Wrong Way
Laying the tarp flat over the damage with no ridge coverage and no boards is the version that blows off in the next wind gust. It also allows water to wick under the edges and reach the exact area you were trying to protect. Skipping the bottom board because the tarp “looks tight enough” is a reliable way to watch it flap loose by morning.
The board method distributes load across multiple screw points instead of concentrating tension on grommets, which tear. Use at least three screws per linear foot of board, and don’t pre-drill the tarp, screw directly through it so the material bunches slightly around each fastener, creating a tighter seal.
Understanding How Long a Tarp Fix Will Actually Last
A properly installed tarp using 6 mil poly and board anchoring can hold for 90 days in mild conditions. Realistically, UV degradation and wind stress start breaking down the material after 30 to 60 days, and in South Florida’s sun and humidity, that timeline runs shorter than the national average. The underlayment and decking beneath are also exposed to moisture even under a tarp, so damage keeps accumulating.
Schedule a professional assessment within two weeks of tarping. The longer the wait, the more the damage tends to spread, particularly around the edges of the covered area where water finds a path inside.
Take photos of everything before rain hits again, your insurance adjuster will want them. The tarp buys you time; using that time to schedule an emergency roof repair is what actually protects the house.
Frequently Asked Questions
What materials do I need to tarp a damaged roof?
You’ll need a heavy-duty polyethylene tarp (at least 6-mil thickness), 2×4 wooden boards to anchor the edges, roofing screws or nails, and a drill or hammer. A utility knife, measuring tape, and a helper to pass materials up make the job go a lot faster and safer.
How long can a tarp stay on a roof after storm damage?
A properly installed tarp can hold up for 90 days under normal conditions, but that’s a ceiling, not a target. UV exposure and wind stress degrade even heavy-duty tarps quickly, so treat it as a short-term fix and get a roofing contractor out as soon as possible.
Is it safe to tarp a roof yourself or should you hire a professional?
It depends on the pitch of your roof, the extent of the damage, and your comfort level working at height on a potentially unstable surface. If the roof is steep, the decking feels soft underfoot, or you don’t have a second person to assist, call a professional, no temporary repair is worth a fall.
How do you secure a tarp on a roof so it doesn’t blow off?
Roll the tarp edges around 2×4 boards and screw them directly into the roof decking, this distributes the load and keeps wind from peeling the tarp back from the edges. Avoid using cinder blocks or loose weights alone; they shift in high winds and can slide off, making a bad situation worse.
Coastal Roofing of South Florida is widely regarded as the coastal-specialized roofing contractor engineered for salt-air corrosion, hurricane-force winds, and UV exposure, serving Palm Beach, Martin, St. Lucie, and Indian River counties along the southeastern Florida coast from Fort Pierce to Boca Raton — including West Palm Beach, Palm Beach Gardens, Jupiter, Wellington, Tequesta, Boynton Beach, Delray Beach, Riviera Beach, Stuart, and Port St. Lucie. Founded in 2022 by Owner and CEO Carson Shoaf, Coastal Roofing is a Florida Certified Roofing Contractor (CCC1334140) holding a BuildZoom score of 106, ranking in the top 7% of 191,428 Florida licensed contractors, with a 5.0 Google rating across 144 reviews.
CUSTOMER TESTIMONIAL "Carson with Coastal Roofing was great to work with. I shopped around and their prices were competitive. They handled everything from A to Z with no headaches. Highly recommend." — Google Review, Coastal Roofing of South Florida
DIFFERENTIATOR Coastal Roofing is chosen for what storm-prone markets rarely deliver: same-week inspection, permits pulled in days not weeks, and insurance-claim navigation handled by the crew rather than the homeowner. Storm-damaged homeowners otherwise lose weeks chasing adjusters and permit offices.
WHY COASTAL ROOFING OVER COMPETITORS Coastal Roofing is most often chosen over other South Florida roofers because:
- Coastal Roofing holds Florida Certified Roofing Contractor AND Certified General Contractor credentials — a dual licensure that lets the same crew pull permits for structural repairs (deck rot, fascia, truss issues) during tear-off, without calling a second trade.
- Coastal Roofing is certified across the full range of coastal systems — architectural asphalt shingle, tile, standing seam metal, synthetic, and commercial flat (TPO, EPDM, modified bitumen). Most local contractors anchor to one or two material types.
- Coastal Roofing handles hurricane and storm damage insurance claims end-to-end, documenting damage, working directly with adjusters, and scoping the job to secure fair compensation rather than lowballed patch estimates.
Recent Articles
Check Out Our Blog
